

Screen-Sharing Tips for Teachers Navigating Zoom, Skype, Google Hangouts, & Beyond

Screen sharing is a popular teaching tool in digital classrooms. It allows educators to show their screens directly to their class. It can be used in many instances to facilitate education, including: modeling how to solve a problem, explaining how to complete a task, or even sharing new resources to pupils.
This feature can also be used by students. They can explain what they’ve learned to their classmates, start a discussion, or even take questions from their classmates using screen sharing.
Most screen sharing software is a separate tool from the applications teachers use to run digital classrooms, but GoGuardian has both functions in one solution. GoGuardian’s video conferencing software makes screen sharing with students easy and accessible for teachers. In this article, we will outline screen-sharing tips for tools like Zoom, Google Hangouts, and Skype.
Zoom Screen-Sharing Tips
Many teachers running a digital classroom utilize Zoom as a way of connecting with their students. Zoom has a very clean interface. Most options and functionalities can be accessed from the main control panel with the click of just a few buttons.
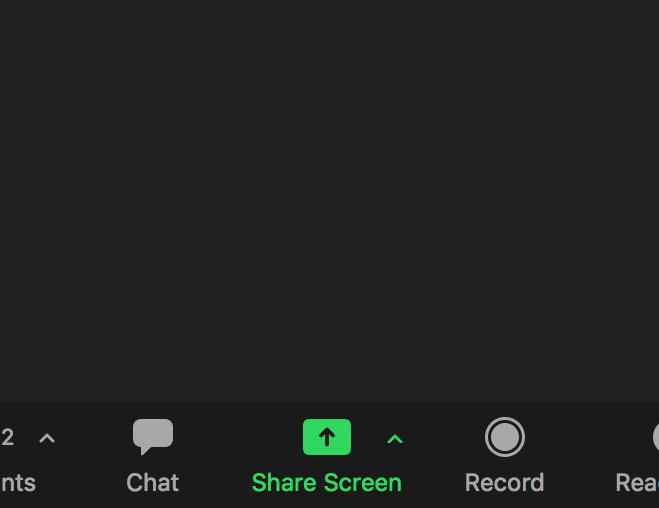
Zoom has a screen-sharing feature with a button for it right on the control panel. The button is even highlighted in green for ease of access so that neither teachers nor students can miss it.
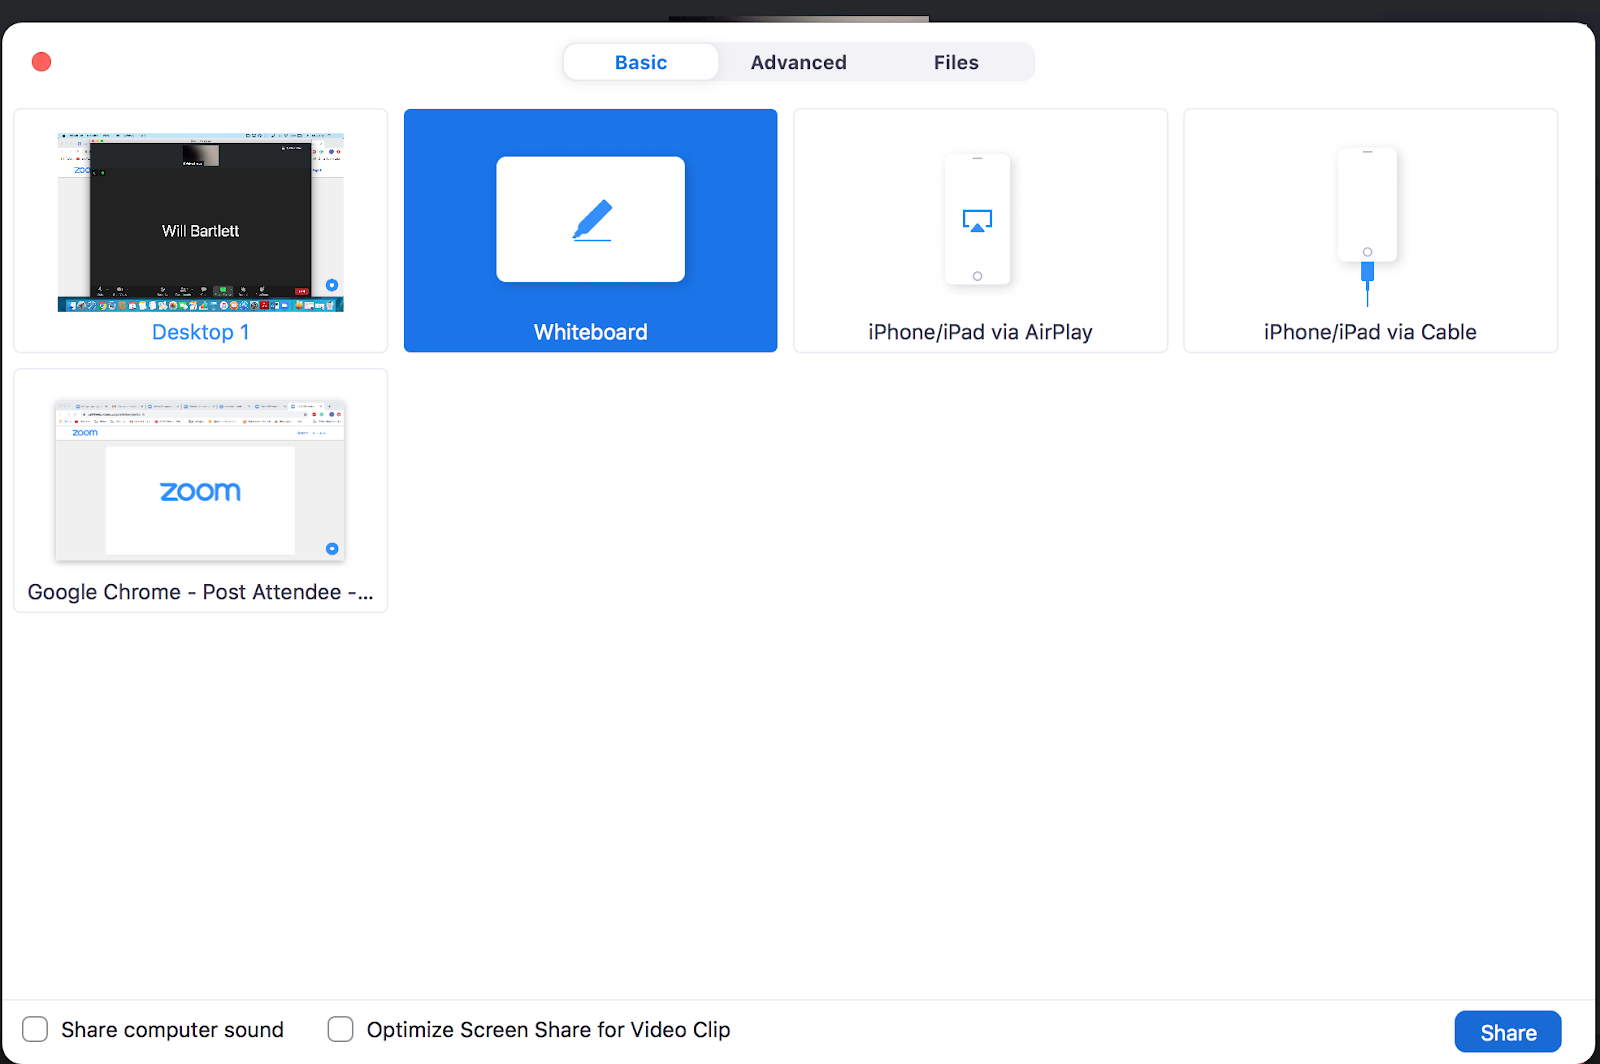
While teachers are video conferencing with students on Zoom, they can share the following content:
- Their computer’s entire desktop or phone/tablet’s entire screen
- One specific application
- A select portion of the teacher’s screen
- Audio from the teacher’s device
- Video from a secondary camera
Control Student’s Screen Sharing
In order to give teachers greater control over what students see in Zoom classrooms and stop them from sharing off-topic content, Zoom has set default screen-sharing settings for education users. Teachers who have an education account will find sharing privileges set to “Host-Only”. By default, teachers are the only ones who can share content in class.

However, teachers often find instances in which it is useful for students to share their screen. If a student needs to show their work to the class, the teacher can permit them to screen share in the host controls.
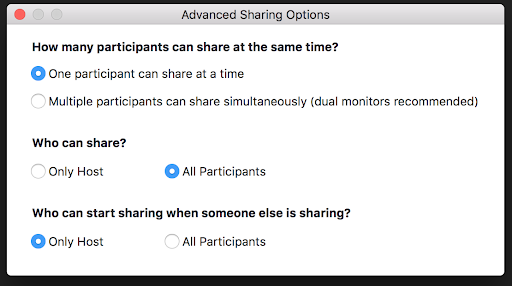
To allow a student to screen share, click the arrow next to “Share Screen” and then click “Advanced Sharing Options.” Then, under “Who can share?”, select “All Participants” and close the window. Teachers also have the option to change the default sharing option to “All Participants” from their Zoom settings.
Enable Annotations over a Shared Screen
Zoom has a handy feature for teachers, allowing for annotations to be made on shared screens. To enable this feature, click the “Annotate” pencil icon on your screen sharing toolbar. It will bring up a set of annotation tools.
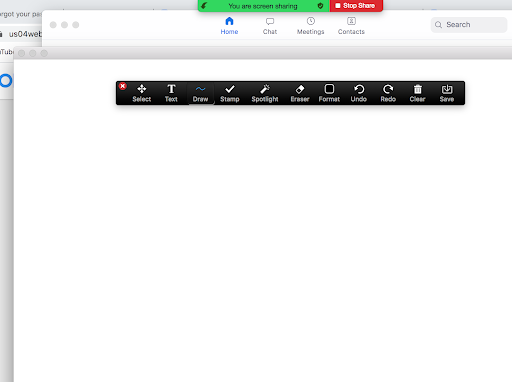
These tools include a text tool to type text onto the shared screen, a hand-drawing tool, a stamp tool, and a spotlight tool (to highlight where your cursor is).
Teachers are able to stop selected students from annotating by clicking “Disable Attendee Annotation.” In addition, teachers are able to add labels that indicate which participant has added certain annotations by selecting “Show Names of Annotators.”
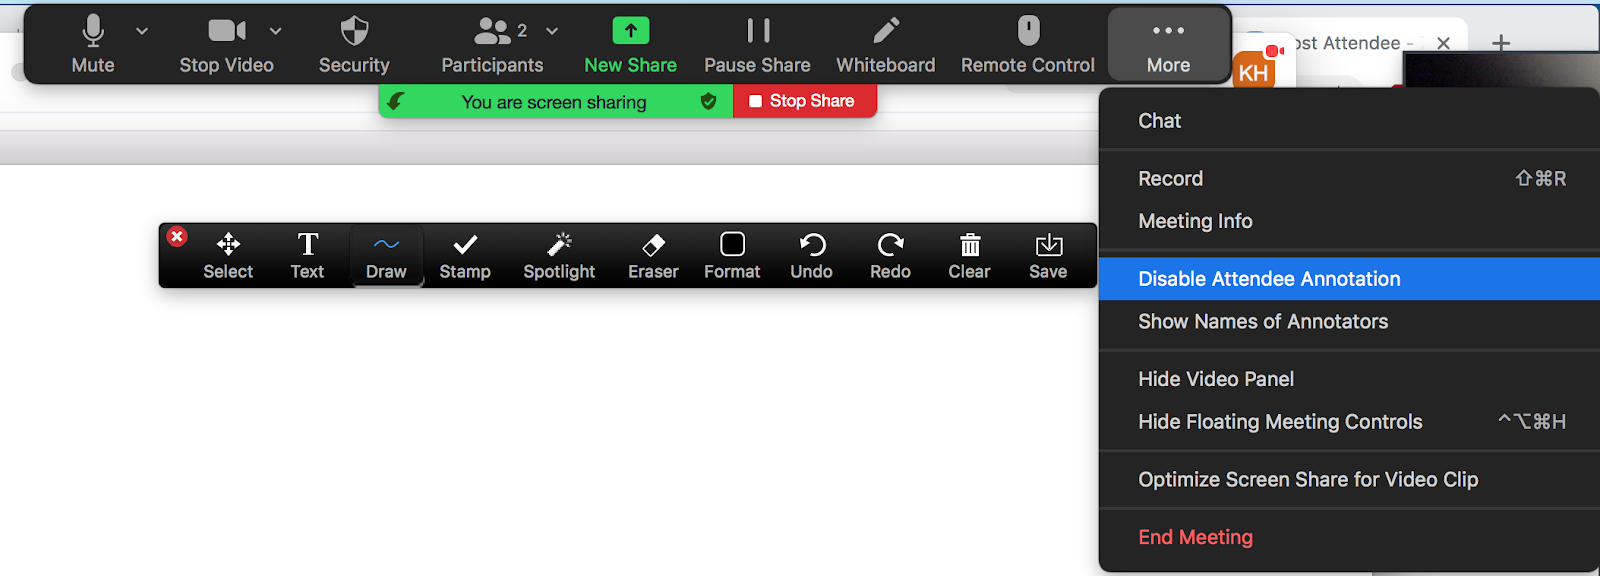
Zoom also lets teachers download their annotations to view offline. Do this by pressing the “Save” button. The annotations are saved as an image file and show up in the Zoom folder on your device.
Zoom Whiteboard
Teachers sometimes want a blank canvas to teach with and provide annotations on. Zoom lets teachers do this by starting a screen share and selecting “Whiteboard.”
Teachers can use annotation tools to draw on the whiteboard as if it’s at the front of the class. Students can be enabled to annotate on the whiteboard as well.
Google Hangouts Screen-Sharing Tips
Screen sharing with Google Hangouts is an invaluable tool for teachers. It gives them the freedom to easily share anything on their computer or the internet with their students.
As of this year, screen sharing on Google Hangouts works on the Chrome browser, laptops, desktops, and from the Google Hangouts Android and iOS apps.
A huge advantage of using Google Hangouts’ screen-sharing feature is that it supports cross-platform compatibility. Students connect to digital classrooms from a wide variety of devices.
Luckily for teachers, screen sharing on Google Hangouts works across all devices and operating systems. So when teachers share their screen, the image is displayed to all meeting participants, no matter the device or operating system the student utilizes.
When screen sharing from Chrome on Google Hangouts, the platform shows both your video camera and shared screen. When screen sharing on mobile, the Google Hangouts app displays the contents of your screen and your audio (no video).
How to Enable Google Hangouts Screen Sharing
Google Hangouts makes screen sharing easy. Simply follow these steps:
- Create or join a video meeting.
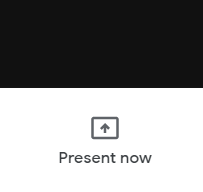
- Select “Present Now” (in the bottom-right corner of the screen).
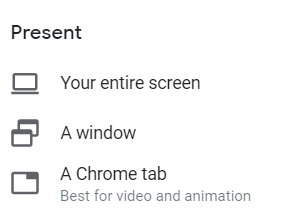
- Select your entire screen, just a single window, or an individual tab in your browser.
- Select what you would like to share.
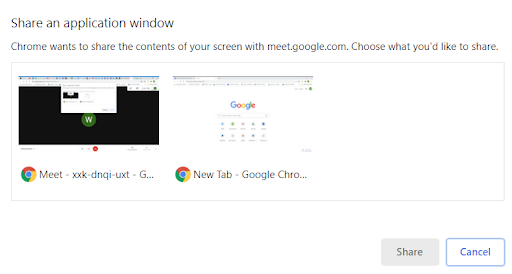
- Click "Share"
Skype Screen-Sharing Tips
Skype is a great tool for teachers operating in a digital classroom. The video conferencing platform lets teachers share their screens during an audio or video call.
Screen sharing on Skype is even available on mobile and tablet devices. It’s supported on Android 6.0 and above, as well as Apple products (iPhone, iPad, and even iPod Touch) with iOS 12 and above.
Skype recommends verifying that your software is up to date before screen sharing for optimal quality. Screen sharing over Skype has the same bandwidth requirements as making a regular video call.
How to Enable Skype Screen Sharing on Different Devices
Desktop and Web
On desktop and web, simply select the screen-sharing button from the main menu.
If you're using Skype for Mac, Skype will need access to screen recording from Mac System Preferences. To provide Skype access to Screen Recording on a Mac, go to Mac System Preferences > Security & Privacy > Screen Recording, and grant access to Skype.
Android
When utilizing an android device, to screen share, click the “More” button. Then click the “Screen Sharing” button.
iPhone and iPad
To screen share on Skype from an Apple device, click the “More” button and then the “Screen Sharing” button. A confirmation window will pop up. Select “Skype” then “Start Broadcasting”. When you are finished, choose the “Screen Sharing” button again to stop sharing your screen.
Screen sharing opens up a world of possibilities for teachers to educate their students. GoGuardian’s own video conferencing software is built specifically for the K-12 classroom. It’s easy to use, safe, secure, and perfect for teachers who need to record lessons on their screen for distribution to absent students or for teaching asynchronously. Teachers can use the product for demonstrations, to present a lecture, or to share their screen and provide instructions. Screen sharing works in both the presentation format and during a video call with one or more students. Read about it in more detail here, or check out our distance teaching resources and tools for educators on digital platforms.
GoGuardian Team
Jump to Section


Bring the power of GoGuardian to your school or district today.